
If your Bernette b70 or b79 no longer recognizes the embroidery frame , in many cases this is not due to the electronics, but to a small, mechanical component: the metal spring in the frame holder of the embroidery unit .
This spring presses against the contacts in the parked position, ensuring that the inserted frame is correctly detected. On older machines, the spring can bend or break – a typical wear part that can be replaced in just a few steps.
1. Symptoms: How the problem manifests itself
- The screen displays "No frame detected"
- The embroidery frame clicks into place, but is not recognized.
- The problem occurs regardless of the frame used.
2. Root cause analysis: Why the spring is crucial
Inside the frame holder of your embroidery unit is a small metal spring that makes mechanical contact with the pins on the frame. Is the spring:
- bent ,
- worn out or
- broken ,
No electrical impulse can be transmitted – the machine then does not “know” that a frame is inserted.


3. Required tools and spare parts
| Tool / Part | Notes |
| Phillips screwdriver | For the case screws |
| Tweezers or fine pliers | To remove the old spring |
| New metal spring | Available through specialist retailers (e.g., Make ma GmbH) |
| Optional: Mobile phone or camera | For photos before the expansion |
4. Step-by-step instructions with pictures
Step 1: Detach the embroidery unit from the device
Unplug the power cord and remove the embroidery unit from the machine.

Step 2: Open the embroidery unit housing
Carefully loosen the housing screws of the embroidery unit on the underside.


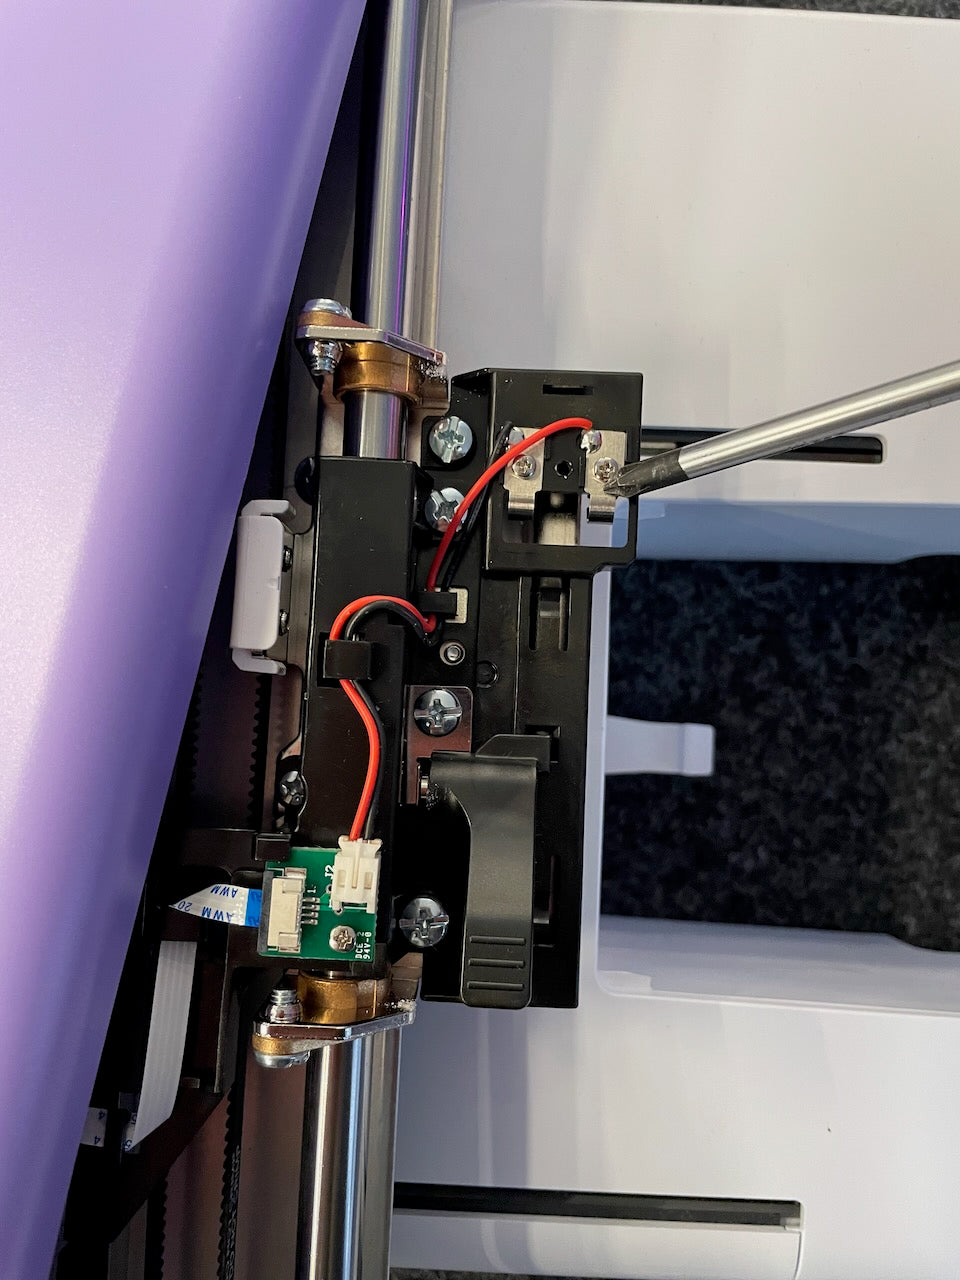
Step 3: Expose the frame
Carefully fold the top shell upwards. The metal spring is visibly attached to the mechanical mount of the frame.

Step 4: Remove the defective spring
Remove the plug if necessary using tweezers.


Step 5: Insert new spring
Install the new spring exactly like the original – pay attention to the correct positioning (see removal image).
Step 6: Close the case and test
Reassemble the embroidery unit. Connect it to the machine, switch it on, and check if the frame is now recognized.
5. FAQ: Frequently asked questions about frame mounting and spring
How can I check if the spring is actually defective?
If several frames are not recognized even though they click into place correctly, the fault is usually with the spring – not the frame itself.
Can I carry out the repair myself?
Yes, with a little technical skill, the replacement is easily possible. You can find the right spring at Make ma or contact us.
Are there any differences between b70 and b79?
The frame mounting is identical for both models. The instructions apply to both machines.
Will I lose my warranty if I replace the item?
Improper repair or modification may void the manufacturer's warranty. If your machine is still under warranty, please contact us before opening it.
Where can I get the right replacement spring?
We stock genuine Bernette parts – including metal springs and instructions. Contact our team to place an order.
Conclusion
If your Bernette b70 or b79 no longer recognizes the embroidery hoop , the cause may be a small, broken metal spring in the hoop holder. With our step-by-step instructions and the appropriate replacement part, you can restore functionality in just a few minutes – safely, precisely, and without special tools.


Split:
Bernette B70 / B79 warranty extension
Error message "Thread break" at Happy Japan