
Embroidery files are transferred to an embroidery machine digitally – usually via USB stick, Wi-Fi, or directly from the embroidery software. The most suitable method depends on your machine model and the required file format. Here you'll find a concise explanation of the most important methods.
Prepare embroidery files
Before you transfer your embroidery files, you should have some basics right:
File format: Make sure you use the correct format for your machine. Brother typically uses .pes, Bernina .exp, Pfaff and Husqvarna .vp3, and industrial machines like HappyJapan or Melco often use .dst.
Hoop size: The embroidery file must not exceed the maximum embroidery area of your inserted hoop. Otherwise, the file will not be displayed or cannot be loaded.
Filename: Use short, clear filenames without special characters, umlauts, or spaces. For example: cat_10x10.pes

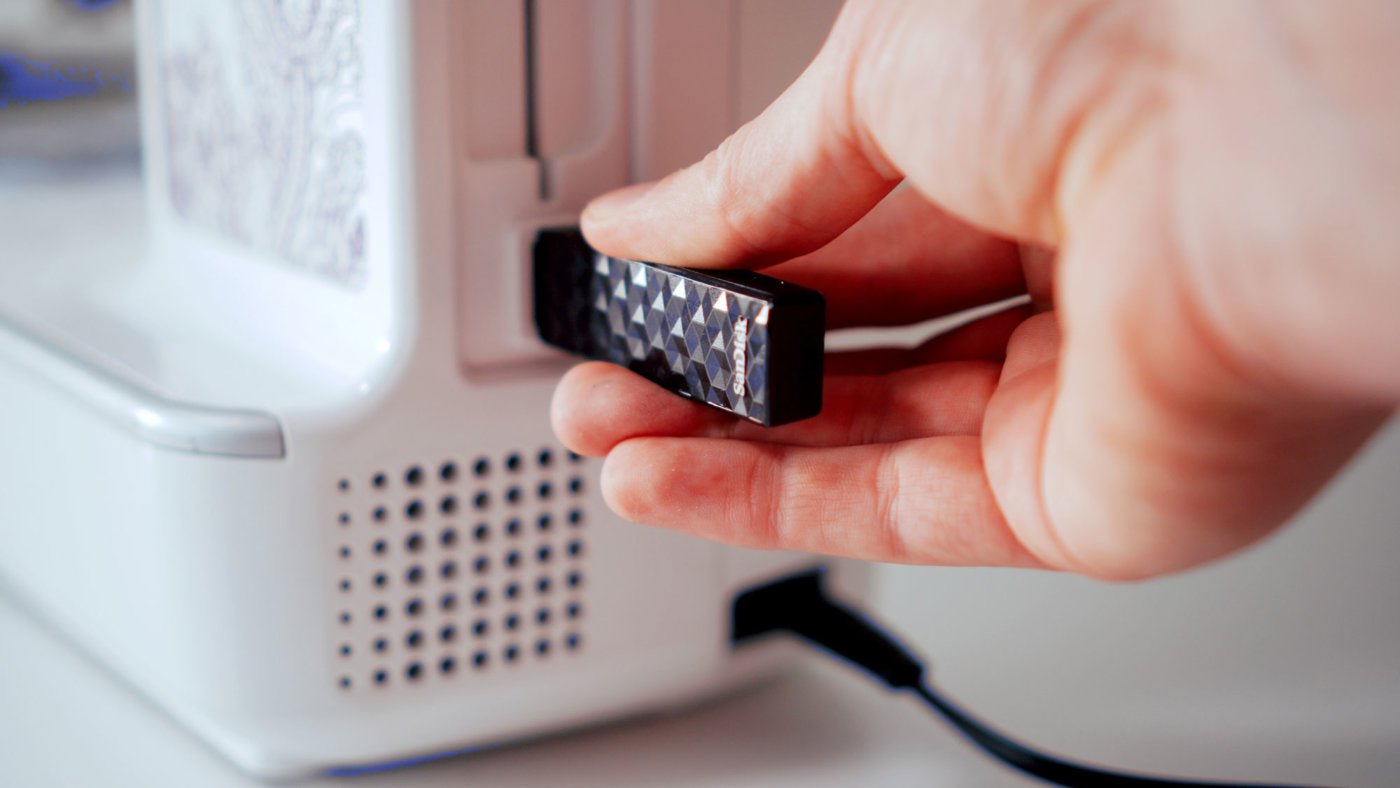
Transfer via USB stick
The most common method is transferring data via USB stick. Here's how it works:
- Format USB stick as FAT32 (not NTFS or exFAT).
- Copy the embroidery file in the correct format to the USB stick – ideally directly into the main directory or into a machine-specific folder.
- Insert the stick into the machine.
- Select and load the file on the machine screen.
Tip: Preferably use small USB sticks with up to 16 GB of storage. Many machines have difficulty with larger sticks or new USB standards.

Transmission via WLAN
Wi-Fi-enabled machines such as the Brother Luminaire series, PR1055X or Pfaff and Husqvarna models with mySewnet access enable wireless transmission.
- Connect your embroidery machine to the Wi-Fi network.
- Install the appropriate program (e.g. Brother Design Database Transfer or mySewnet).
- Select the embroidery file in the program and send it – it will appear directly on your machine.
This method is particularly convenient for frequent transfers.
Transfer directly from the embroidery software
Many embroidery software programs allow direct export to the machine or USB stick.
Bernina V9: Export directly via the “Synchronize Embroidery Machine” function or to a USB stick in .exp format with accompanying inf and bmp files.
Creativate (formerly mySewnet) (Pfaff/Husqvarna): Designs can be saved in the cloud and loaded onto the machine via Wi-Fi.
This method is ideal if you are creating your own embroidery files or editing existing ones.
Transfer via SD card or USB cable
Some older machines require a USB cable connection.
USB cable: Use the manufacturer's included embroidery software to transfer files from your computer to the machine.
These methods have become rare, but are still common in older models.
Common errors and solutions
The embroidery file is not displayed:
Check the file format, file name and frame size.
The USB stick is not recognized:
Format the drive as FAT32. Avoid large USB drives or USB 3.0 drives.
The file cannot be started:
A necessary accompanying file (.inf, .bmp) may be missing, or the file may have been saved on a Mac without proper conversion.
The machine displays “invalid file”:
Export the file again directly from your embroidery software, making sure the settings are correct for your machine model.


Split:
Bobbin thread comes up
Why does my embroidery machine display different colors?