
Embroidering patches was one of our very first projects with the embroidery machine. Back then, it was quite classic: embroider the design onto felt, cut it out, and you're done. Charming, creative – but from today's perspective, just the beginning.
Over the years, we have consistently developed, tested, discarded, and optimized our patch technique. Today, we have reached a point where our hand-embroidered patches have a clean, closed satin edge and are visually indistinguishable from professionally manufactured industrial patches.
And now comes the next step.
- 1. Embroider patches like a pro
- 2. From the past to the present: Our patch development
- 3. What you need to embroider Klätsches
- 4. Making your own patches – step by step
- 5. Why Klätsches are so special
- 6. Patch embroidery in the video
- 7. Implement your own ideas as a Klätsch
- 8. Products for this project

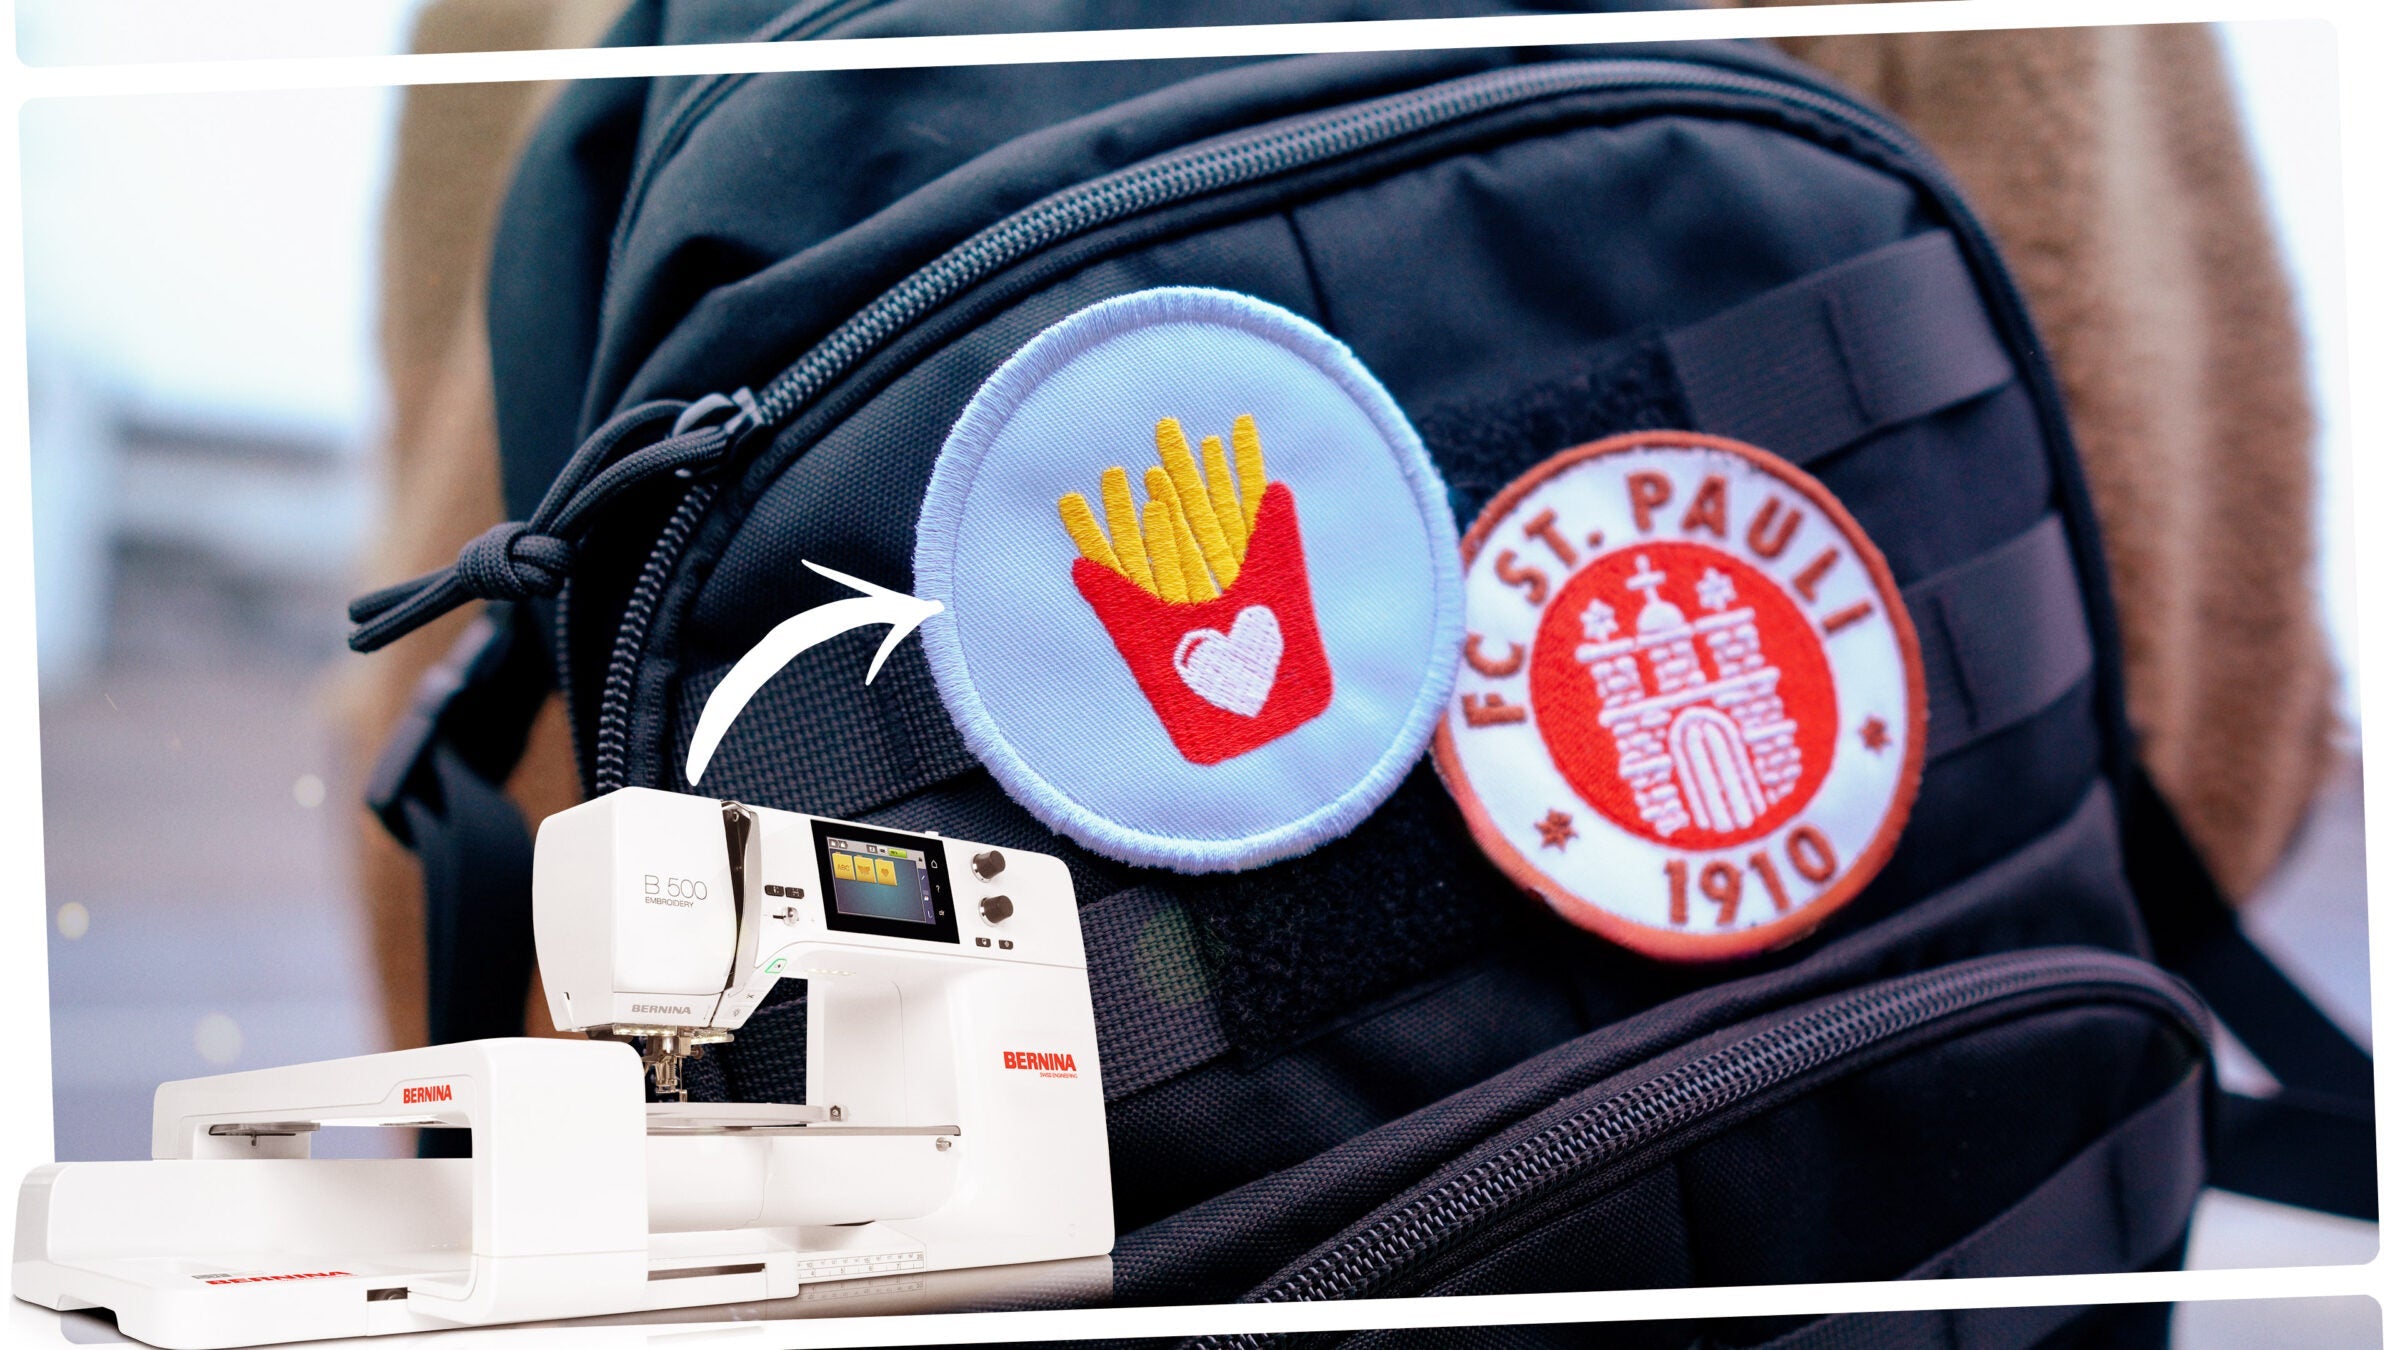
Our latest innovation: Patches with Velcro backing – Klätsches.
Klätsches are embroidered patches with an integrated hook-and-loop backing. They can be easily attached, replaced, and removed – without sewing, ironing, or compromises.
The best part: This technique works with any embroidery machine . It's based on our accumulated know-how from many years of machine embroidery – and yet it's perfectly suitable for everyday use.
Embroider patches like a pro
Patches are more than just decoration. They represent attitude, humor, and a statement.
What used to be a tedious process – sewing on or permanently attaching patches – becomes surprisingly easy with a hook-and-loop backing. These hook-and-loop fasteners make patches flexible: today on your backpack, tomorrow on your jacket, the day after on your schoolbag.
This is ideal, especially for children. Designs can be changed at any time, clothing remains undamaged, and the creative possibilities grow with every new idea. But Velcro patches are also a real highlight for adults, outdoor enthusiasts, or individualists.


From the past to the present: Our patch development
For some designs, a visible felt edge is still exactly right. We love this look – and continue to use it deliberately.
In parallel, we have developed a technique that gives patches a clearly defined, continuous satin border. Precise. Durable. High-quality.
This technique forms the basis for our Klätsches.
Note: We've perfected the technique presented here using all the knowledge we've gained over the past few years. This type of DIY hook and loop patch works with any embroidery machine!
I never would have thought that the little stickers would bring so much joy – and work so perfectly. I embroidered the cute designs with my Brother 880E for my daughter's school cone and then simply transferred them to the Ergobag. No sewing, no stress, everything stays on perfectly. My daughter was absolutely thrilled – and to be honest, so was I.

What you need to embroider Klätsches
The requirements are deliberately kept low:
- an embroidery machine with a frame of 8 × 8 cm or larger (the cheapest model is the Brother M340ED )
- an embroidery file with a clean satin border
(Ideal: files specifically created for Klätsches, free download below) - Ultra Solvy (stable, water-soluble film)
- a patch base as a carrier material
- Hook and loop backing with sewn edge (Klätsches)
- curved applicator scissors
- Embroidery thread, bobbin thread and your standard accessories
You can find all the necessary materials together in our shop as a set .


Making your own patches – step by step
Our preferred technique ensures a professional edge and a stable shape:
-
Clamp the embroidery film in place
Stretch Ultra Solvy in your embroidery hoop – depending on the design, you can use two layers. -
Laying down patch base
The patch base is laid loosely as a backing material. -
Embroider motif
Stitch your patch design as normal until just before the last sequence. -
Cut out
Carefully remove the frame from the machine and cut off the excess patch base close to the design.
The curved applicator scissors are worth their weight in gold here. -
Integrate Velcro backing (optional)
For a normal patch: simply reinsert the frame, and you're done.
For a slap: Now place the Velcro backing on the back of the frame and fix it in the middle with double-sided adhesive tape or spray adhesive. -
Embroider satin border
In the final stitching step, the Velcro is perfectly enclosed thanks to its stitched edge.
Clean. Durable. Precise.
Simple – and that's precisely why it's so ingenious.


Why Klätsches are so special
Velcro patches open up completely new possibilities:
- flexibly interchangeable
- no permanent alteration to clothing or bags
- ideal for backpacks, school bags, jackets or bags
- Perfect for children – and for everyone who loves variety.
And last but not least: the embroidery itself is incredibly fun. The technique is clear, reproducible, and not time-consuming. A project that perfectly combines creativity and precision.
Patch embroidery in the video
In our livestream, we show you the complete Klätsches technique step by step in moving images.
You'll see the entire process, get practical tips – and of course, as always, we'll talk about new developments in the embroidery world and have creative fun together.
Implement your own ideas as a Klätsch
Do you want to create your own designs as Velcro patches? No problem.
In the livestream, we'll explain how to work with two basic embroidery files that you insert before and after your design. The embellishable area is round and has a diameter of approximately 6.5 cm .
We provide the basic embroidery files, including detailed instructions, as a free download.
Products for this project
All materials, embroidery files and accessories from this post can be found in our shop.
Select the right product directly or use the search to discover more options and inspiration.
Klätsches are not a trend. They are a new way of thinking about patches.
Flexible. High-quality. Homemade.


Split:
ITH pig embroidery – 3D embroidery technique with the Brother 880E
Embroider patches: Make your own badges with an embroidery machine