
What is the difference between embroidery and cutting files?
An embroidery file contains information about stitches, thread colors, and sequences. Plotters, on the other hand, require paths—pure line information. Therefore, an embroidery file must be converted into a vector-based format that the plotter can read (e.g., SVG or FCM).
When does the conversion make sense?
The conversion makes sense if:
- you want to prepare an iron-on patch or appliqué from an embroidery motif
- you want to cut a motif as vinyl foil or flex foil
- you want to use a contour or outline from the embroidery file

A module of the embroidery software Creativate is the option to draw in vector graphics.
Step-by-step: Export embroidery file as cutting file
In Creativate (formerly mySewnet):
- Open the desired embroidery file
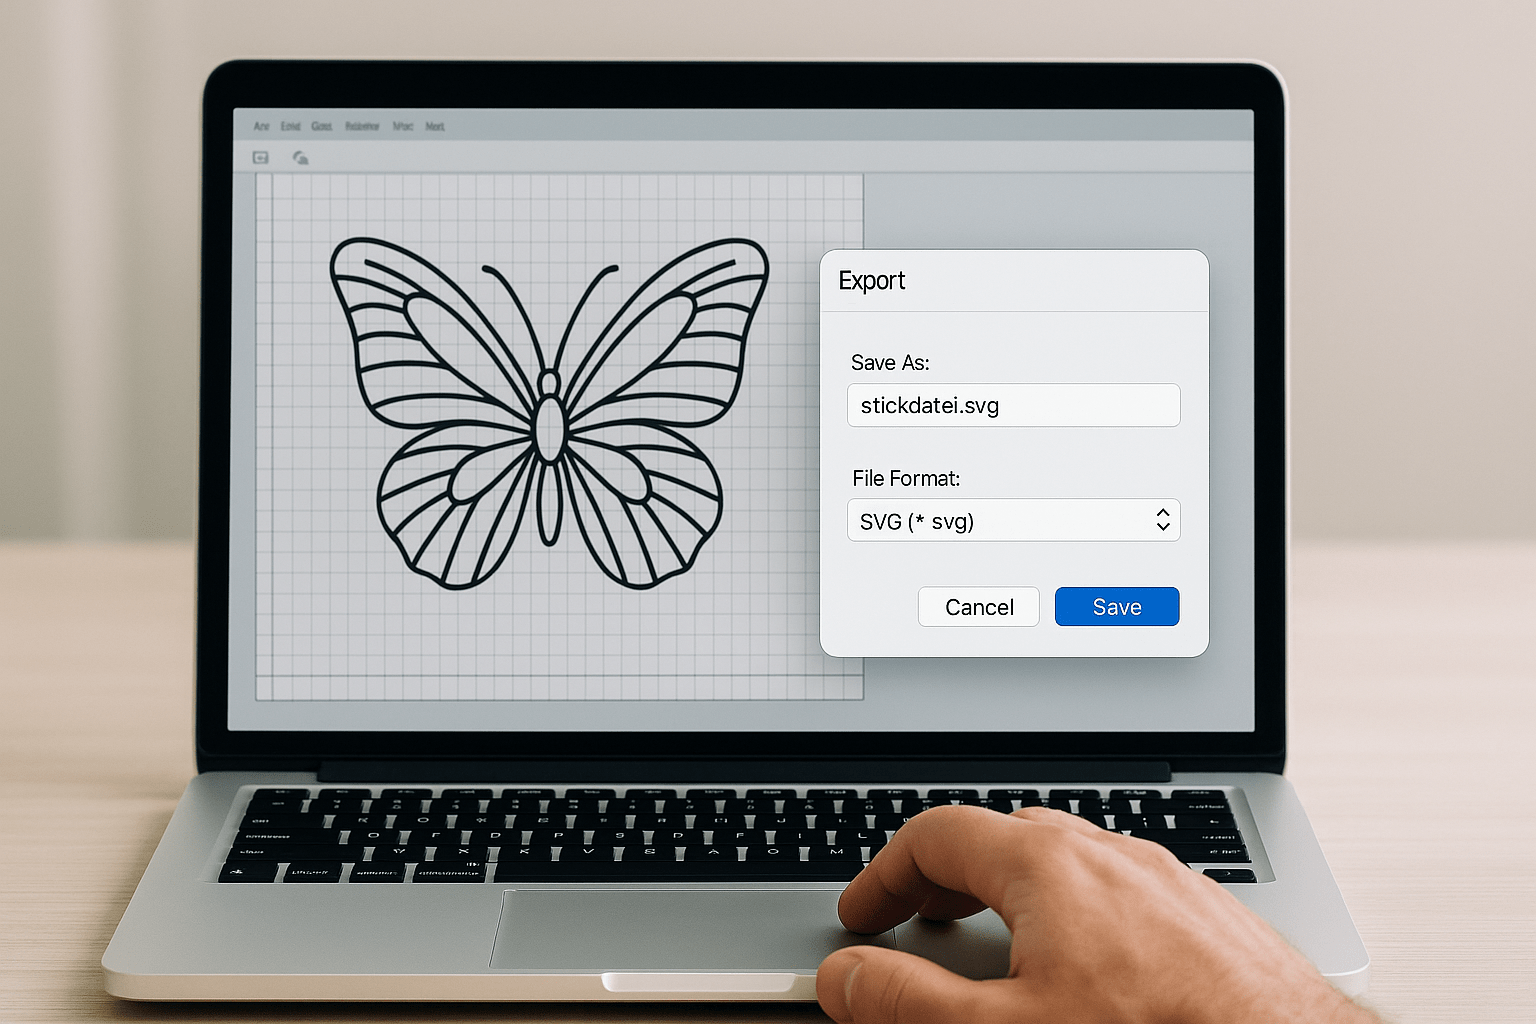
- Select the “Export” or “Save As” tab in the menu
- Click on “Export Appliqué Piece” or “Export Outline”
- Choose the format SVG (for Cricut, Brother, Silhouette etc.) or FCM (Brother)
- Save the file to your computer or USB stick

You can save the created graphic via File -> Save as Drawing.
Make sure to manually edit the outlines if necessary to remove unnecessary layers.
Suitable file formats for plotters
- SVG: Universally compatible with Cricut, Silhouette Studio, ScanNCut Canvas
- FCM: Own format for Brother ScanNCut
- DXF: Supported by older versions of Silhouette Studio
- PNG (high resolution): Only suitable to a limited extent – may need to be vectorized

A selection of different file formats is available for saving to your plotter.
Tips for a clean cutting result
- Avoid details that are too small – plotters cannot simulate stitches
- Check the paths in the plotter software before cutting
- For applications: Use the export function directly from the embroidery software for exact contours
- First cut on test material, e.g., paper or foil scraps
{"layoutMobile":2,"layoutDesktop":3,"buttonAlign":"Center","buttonText":"To Product","productTitle":{"hue":213,"saturation":0,"brightness":0,"alpha":1},"priceColor":{"hue":0,"saturation":1,"brightness":0},"discountPrice":{"hue":356,"saturation":0.74,"brig htness":1},"buttonColor":{"hue":213,"saturation":0,"brightness":0,"alpha":1},"textBottomColor":{"hue":0,"saturation":0,"brightness":1},"activeTitleButton":false,"moreProduct":"View all","moreProductUrl":"qj7jnf-up.myshopify.com","rowNumber":1,"dynamicProductId":[{"id":"gid://shopify/Product/14991336472951","title":"mySewnet™ PLATINUM","currencyCode":"EUR","amountMax":"899.0","amountMin":"199.0","price":"899.00","compareAtPrice":"1799.00","imagesUrl":"https://cdn.shopify.com/s/ files/1/0919/2954/3031/files/mysewnet-platinum-sticksoftware.jpg?v=1750951697&width=600","urlStore":"/products/mysewnet-platinum","altImage":"Embroidery software mySewnet® PLATINUM"},{"id":"gid://shopify/Product/14991336309111","title":"Embroidery software mySewnet® GOLD","currencyCode":"EUR","amountMax":"499.0","amountMin":"149.0","price":"149.00","compareAtPrice":"279.00","imagesUrl":"https://cdn.shopify.com/s/ files/1/0919/2954/3031/files/sticksoftware-mysewnet-gold.jpg?v=1750951697&width=600","urlStore":"/products/premier-2-extra","altImage":"Embroidery software mySewnet® GOLD"},{"id":"gid://shopify/Product/14991334867319","title":"Embroidery software mySewnet® SILVER","currencyCode":"EUR","amountMax":"299.0","amountMin":"79.0","price":"79.00","compareAtPrice":"199.00","imagesUrl":"https://cdn.shopify.com/s/fil es/1/0919/2954/3031/files/sticksoftware-mysewnet-silver.jpg?v=1750951698&width=600","urlStore":"/products/premier-2-embroidery","altImage":"Embroidery software mySewnet® SILVER"}],"typeSearch":"product","device":"desktop","decimalsPrice":2,"aspectRatio":"3 / 4","isAutoPlay":false,"isNavigation":false,"isPriceDisplay":false,"rowDynamic":"mot","activeDecimals":false,"hidden":false,"locked":false,"positionPrice":true,"currencyCodeCustom":"$","componentName":"Products - Creativate Software","componentId":"DynamicProduct-Xrfx95h68Sf3","type":"DynamicProduct","updatedAt":"2025-07-12 T12:16:32.265Z","createdAt":"2025-07-12T12:16:32.265Z","activeDynamicProd":true,"blockName":"Product"}


Split:
Embroider names in series: Batch processing in Creativate
Embroidery file cannot be saved